'68 Wheel Bearing Assembly Swap
Fix one thing, screw another up... ever done that? I've gotten quite good at it over the years! Last year I managed to over torque my wheel nuts on the '68 and snapped a lug off the right rear wheel. I replaced the lug which was cheap enough, only about a $1.50 but first I had to pound out the old lug which is press fit in the wheel plate. It took a lot of pounding, much more than I expected and I worried I was messing up the wheel bearing with the beating I was giving it. Sure enough, later in the summer the right rear wheel began to squeak. This was not a good sign because it could even be heard above the passenger seat..
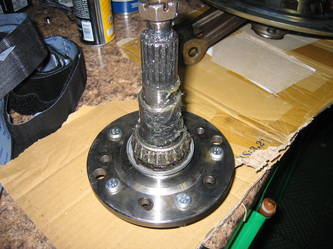
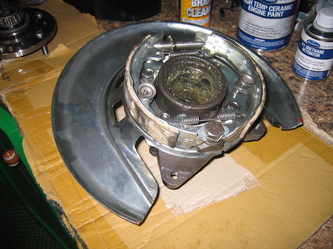
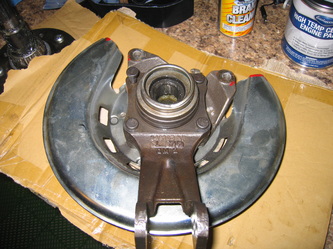
I want to be able to drive the car where I please and free of worry of something like a wheel bearing seizing so I thought I better fix it. I know enough about wheel bearings on C3's to know to replace a rear wheel bearing takes some specialized tools or you won't get the bearing properly seated. About 10 years ago I rebuilt the entire suspension on the car and changed all the bearings, ball joints and u-joints. When I did this I saved myself a lot of work and purchased rebuilt trailing arms from Ikerd's in South Bedford, IN. This required an entire new 4 wheel alignment when I was finished. I went back to Ikerd's for my needs this time and purchased a right wheel bearing assembly. This unit includes a new bearing, properly seated and a new parking brake assembly.
http://www.mcssl.com/store/ikerds-inc/catalog/product/f00fc9ff773148cd88e85c963d798cd0
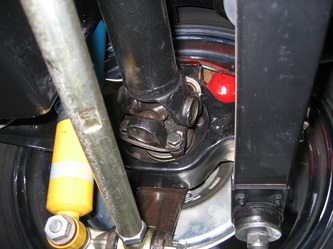
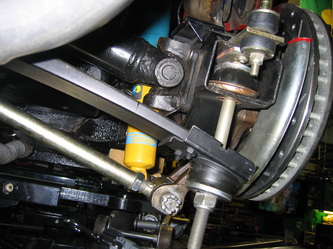
Still its not an easy project. I removed the wheel and set it aside. Then I unbolted the brake caliper and tied it up out of the way. I removed the brake rotor and set it aside. Then I detached the parking brake cable. Next I unbolted the bottom of the shock absorber and pulled it off the mount and pushed it aside. Then I removed the strut nut and had to pound the strut/shock mount bolt out of the old wheel bearing assembly... this took some serious muscle. Donna was probably hiding in a closet thinking I had finally gone bonkers! Next I unbolted the half shaft from the wheel axle flange and moved the half shaft out of the way so I could remove the cotter pin and nut that holds the half shaft flange on the axle. Finally I pounded the axle out with several serious whacks so I could get at the 4 anchor bolts and nuts holding the wheel bearing assembly on the trailing arm. Once I removed these 4 nuts the assembly came out and then I knocked the bolts out of the trailing arm.
Whew... done. Well with the demolition part anyway.
Putting it back together went a little easier. First I had to bolt the wheel bearing assembly to the trailing arm. Next I installed the flange to the axle, torqued the nut to 90 foot-pounds and inserted a cotter pin. With the flange in place I could reattach the half shaft. Then I cut the strap holding the caliper up, reinstalled the caliper, re-torqued the bolts. I reinstalled the brake rotor. Then I reinstalled the strut bolt and strut. This took a little more pounding and sent Donna for cover again. I torqued it to 75 foot-pounds and then installed the bottom of the shock and re-torqued it. Almost done except for a little cussing because if you've been paying attention you may have noticed I forgot to reattach the parking break cable... sh%#!!! Okay off with the caliper and brake rotor once again so I can reattach the brake cable. Back on with the brake rotor and caliper. I check to be sure I don't have too many spare parts... none, that's good! Let's see did I torque everything? Think so... clean everything up and back on with the wheel.
I was careful when I reinstalled the strut to return it to the previous settings so I'm optimistic I won't need a re-alignment. I'll watch the tire wear but with the few miles I put on this car it shouldn't be a problem.
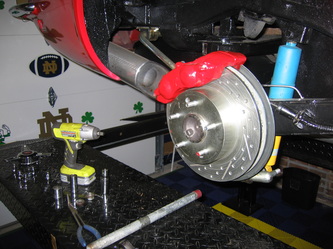
All done? Well not quite. Remember the " Fix one thing, screw another up..."? Well all this on and off stuff chipped the paint on the caliper and there is a car show coming up so off to AutoZone for some fresh caliper paint and a little touch up work!
Long day's work but there is a certain satisfaction in doing this kind of work yourself and usually its cheaper then taking it somewhere and its done on your time frame to. Now send the old part back to Ikerd's to retrieve my $100 core charge and call this project complete!
